Showing posts with label home and garden. Show all posts

Tuesday, August 25, 2015

Old Buildings, Radiators, and Getting With The Times

panorama of our living room
We live in a pretty old building - well, old by American standards, anyway - and we enjoy some amazing pre-war features in our apartment. All the units are spacious, with high ceilings, wide sash windows, practically noise-proof walls, and plenty of closet space. (You don't find those things in new apartment buildings, and definitely not under rent control!) My favorite feature of our home, though, is the radiators. They give our rooms so much character, and I just love the look of them!

Of course, the radiators mean that there's no central heat or air, which is why we have a window unit in the bedroom and another in the living room, and it's a good thing, on the whole, that our building's management is putting HVAC systems in every apartment in our building. I mean, I'm glad from a creature comforts point of view because modernity is awesome and it will be nice to have an extra few inches of space along the walls especially in the hallway off the kitchen and next to the sink in the bathroom. But aesthetically I'll be melancholy once the work is done and the radiators are removed. I've been preparing to miss them for weeks, ever since I asked if we could keep them just for decoration and management said no.

When management called me yesterday to say they'd moved up the timeline for the work - they'll start next week instead of later in September - I took to Pinterest and Apartment Therapy in a bout of masochistic pre-nostalgia for how great spaces with old-fashioned radiators can look. Aren't these gorgeous? Le sigh...

via 
via
via

via / via
via

Thursday, August 20, 2015

Cotton On To You

our bedroom when we were switching out the rugs
Our second wedding anniversary is on Monday next week, and I took advantage of the traditional gift of cotton as an opportunity to shop for a new duvet. So romantic, right? But you see, dear readers, we're not just getting a new duvet cover; we're getting a new duvet cover and a new duvet, both king-sized upgrades from the queen set we have now, and they are not everyday purchases! (I needed a strong excuse to convince Jon we should spend the money, and our anniversary fit the bill perfectly.)

Charlie, of course, was the other excuse I used. We have a queen-sized bed and Jon and I both like to have the covers bunched around us, which would be fine if we were the only ones ever on the bed. Obviously, we're not.

We've actually done a really good job of training Charlie not to get on the bed while we're sleeping. He'll cuddle with us up there as we prepare to go to sleep, but as soon as I say, "Okay, I'm turning the light off!" he jumps off and curls up on his own bed. He also knows he's allowed up when I start stirring in the morning - around 6am if I've gone to bed at a decent hour and/or the sun rises early - but he has to be invited. And then, of course, once we've gone out for our first walk of the day, the bed is free game for him. It took a good few months to train him (and ourselves to be strict) on this, but we've done it!

Sharing a queen-sized duvet between two people and a 70lbs dog, while doable, is not ideal, and so we're buying a new set of cover, shams, and duvet.

Here are the aesthetic guidelines each of us proposed:

Jon: solid or striped, no big geometrical patterns or florals if any kind
Betsy: piping or center square ribbon if solid, small geometrical patterns, no stripes
Charlie: no light fabrics without a dark pattern

Jon and I ended up compromising on the stripes thing by moving a rag rug that had been in my childhood bedroom for a decade into our bedroom in the apartment. We looked at a lot of less-obtrusive geometric patterns, but decided they all clashed with the paintings on our walls. Ultimately, then, the only option was a solid dark duvet cover - exactly what Jon and Charlie had been lobbying for all along! I'd say that the boys win again, but I'm very pleased with what we found and the sale price at which we found it.

Speaking of sale prices, I want to applaud Overstock.com for their amazing customer service in helping me buy a duvet. They went above and beyond in answering my questions, understanding my budget, and really making my experience more personal, which is hard to do on a website like that. The duvet was ordered today, so hopefully you'll see the set on the bed soon after our actual anniversary on the 24th!

In the meantime, though, these were some of the finalists that I considered as possible options that Jon wouldn't dismiss out of hand. (He did for most of them. Oops.) Any catch your eye? I'd love them all, but these boys...

1 / 2 / 3 / 4 / 5 / 6 / 7 / 8

Wednesday, April 15, 2015

Closeted

The Container Store
At 1:30am on Thursday night last week, Jon and I were woken up by an almighty crash.  (Charlie, defender of the realm extraordinaire, didn't even stretch in response to the noise.  He clearly has selective hearing that picks up on doorbells ringing in TV shows but not threats in real life.)  Jon leapt out of bed to investigate but found nothing amiss; when he got back to bed, we agreed something outside must have fallen down.

The next morning, my routine was much the same as ever: I took Charlie for a short walk around the neighborhood in my PJs, made coffee, jumped in the shower, started to get dressed... and discovered that the crash we'd heard a few hours earlier had been the shelving collapsing in our bedroom closet.

Management has promised us that we'll have new shelving installed by the time we get back to DC on Thursday.  On the one hand, it's great that we're out of town right now because it means maintenance can come and go without worrying about us (or about our intrusively helpful dog).  On the other, management and maintenance have not always been on the ball for us when we've needed them to be, and this is one of the times when we'd really like them to deliver as my in-laws are coming to see our apartment in just a few days and I don't want them to walk into a federal disaster area.

Of course, my nesting/controlling side is having a minor panic at not being in the apartment to oversee the work; even though we're in a rental, I'd love to have some input on what's installed and where.  I know the shelving won't be anything fancy, but I've been dreaming about Elfa systems and matching hangers that all face the same way and dresses organized first by formality, then by color, then by length.

This is probably diagnosable, isn't it?  Oy vey.

Thursday, February 19, 2015

Home Inspiration Within Reach

Jon and I have been in our new apartment - the first we moved into together as just the two of us - for nearly five months now and it's finally feeling permanent.  We've known since day one that we plan to be at this address for a couple of years, but for the first few months I stubbornly maintained a low-level dissatisfaction with how we'd decorated and were living in the space.

Yes, I'm a delight.  I know.

Something clicked recently, though, and I'm much more content with what we have and how we're using it.  I still imagine how the apartment will evolve but my fantasies are less abstract than they were; rather than being consumed by a general sense of "this isn't finished," I've defined a few things/areas that will change eventually.  And, I was surprised to discover, making peace with "eventually" was a big part of my adjusting my mindset.  Our apartment isn't unfinished - it's simply in progress.

To that end, when I do think about what this apartment might look like down the road, I'm much more intentional.  I no longer let myself get carried away by pieces or aesthetics that either don't work with our space or with Jon's taste.  (Our somewhat distinct preferences have made decorating an interesting challenge!  To be discussed in another post...)  Ideas can come from anywhere, sure, and can be adapted to anything, but I limit myself to dreaming about what realistically fits our styles, budget, and life when I idly search through Craigslist, page through catalogues, or scroll through design websites.  I've even started following a few Instagrammers whose homes serve as inspiration within reach for me - here are some of my favorites at the moment:


A photo posted by Karen (@somewhereonmain) on


A photo posted by Nicole (@windyhill_cottage) on

A photo posted by Layla (@mysunsetavenue) on

Thursday, January 29, 2015

Alone Time


In my last post I celebrated the fact that Jon and I are together.  "It's amazing," I said.  You know what else is amazing?

Having the apartment to myself.

Alone time, so loathed when Jon was across the ocean, is again a glorious thing.

You were right, dear readers; my single girl behaviors are still out on display even though my husband is around, and he no longer bats an eye when I come out of the bathroom with my face slathered in green mud or when I decide I'm going to blast the soundtrack to Wicked while sweeping.  In fact, he's even started participating in my conversations with Charlie!  But sometimes - just sometimes - I really want to be by myself in the apartment.

Jon has a few evenings a month on his own at home due to the frequency of my work events and, now that he's doing shiftwork, I've enjoyed a few, too.  (In the interest of full disclosure, though, I will tell you that, after Jon had been in DC for about six weeks, I ordered him out of the apartment for an evening so I could breathe.  I kissed him when I got home from the office and handed him $40 in cash and told him not to come back until 10pm.  I just needed one night!)  Tonight, actually, Jon's pulling a late one, so I'll get to eat unspicy stir fry and watch Law and Order: SVU and flip through catalogues filled with things we'll never buy - all with impunity.  It's going to be fabulous.

Monday, September 29, 2014

Moving in and Settling Down


Well, I'm pleased to report that Jon and I are on day three of shifting all of our possessions down the hall from one apartment to another and we're still together both physically and emotionally.  It would be a lie to say that some casual threats haven't been flung around, but we're actually having fun with this.  Believe it or not, even moving hasn't propelled us out of the honeymoon stage after more than two years apart.

I made a real effort to call the last apartment "our" apartment and I conferred with Jon before making decor decisions because I wanted him to feel like it was his home, too, but realistically it would have always seemed like mine.  That's why the timing of this move, though unexpected and largely unsought, is perfect; we found out the day Jon arrived that it was an option, picked out paint colors that weekend, and began moving five days later.  And so this apartment, right next door to the first, is technically our first real apartment together as a couple.  What a start to the new year, right?  Talk about moving oneself as the rabbis suggest!

The plan is that we'll stay in this apartment until we can buy our own place.  It'll take a few years, given the state of our savings accounts after months of unemployment (formerly mine and now Jon's until he finds a job in the States), the price of maintaining a transatlantic relationship, and the cost of the visa process, but I'm okay with that.  I mean, I want us to own our home one day, but I'm so glad to be settling down for an extended stay in one place.  It's strange to think that my stint in the last apartment, all 17 months of it, is the longest I've lived at any one address since I graduated from high school.

I've spent years in one city before moving to another, but, like most college students and recent grads, I moved every year or so until my mid-20s.  Since 2004, I've lived in five different rooms in Manhattan, two apartments in Paris, three flats in London, my parents' house in suburban Maryland, and in this building, my current home, in Washington, DC.

Whew!  What a whirlwind.  Jon had been at the flat in North London that he left ten days ago for three years, so he's good at settling in and settling down.  In fact, I think he'll be guest posting here tomorrow to tell you how he feels about the new apartment...

 photo 866de425-8336-4c63-9efd-1c4dd8bf0e62_zpsafe0d56b.jpg

Sunday, August 3, 2014

The Four Quadrants of DC


There's a wall in my home, just to the right of the doorway into the kitchen from the hallway, that's given me grief since I moved in over a year ago.  It's the first wall you face when you walk into my apartment proper from the entry, so whatever I hang there makes a big statement about my decor and style sensibilities.  The problem is that the fusebox lives on this wall and it's off-center.  It's been almost impossible to find a piece of art that's the right dimensions for the width of the wall, hides the fusebox, and hangs evenly given the protrusion of the fusebox handle.  (You can see the fusebox in these photos from one of my experiments.)

Finally, I gave up on the idea of finding one frame that would tick all three of these boxes.  I caved a little on my refusal to have a gallery wall in my own home and arranged four vintage gold frames that I'd bought at Miss Pixie's months ago in a way that covered the fusebox but was centered against the width of the wall.  And then, of course, I took to Instagram, where Bethie and Kate and Beka inspired me to contact Cherry Blossom Creative, my favorite local collective of illustrators, about a commission to fill the frames.

Tori, the founder and principle designer at CBCreative, went above and beyond in working on this project for me.  I said I really liked their DC neighborhoods print but asked if it would be possible to get it in black and white, cut up into four pieces to fit the placement of the frames.  Here's an excerpt from the first email she sent me:
"We can make this work!  I'm a little worried that it'll be tough to make everything line up perfectly, so I did a quick mockup to experiment. What do you think?"
I was stunned - I hadn't even placed an order, and attached to the email was my original Instagram with her prints superimposed into the frames!  We went through a few tweaks (which, much to my chagrin, involved actually measuring things so the frames were spaced evenly on the wall, which they hadn't been before), and I'm so happy with how it turned out.  As you can tell from the photos below, the fusebox isn't totally invisible under the top right frame, so I might check with my building management to see if we can take the handle off the little door so that the frame hangs straight.  Regardless, I love it!  And I can't recommend Cherry Blossom Creative enough if you're looking for DC-related illustrations!


 photo 866de425-8336-4c63-9efd-1c4dd8bf0e62_zpsafe0d56b.jpg

Sunday, June 29, 2014

A DIY Ikea Upgrade


When I moved into my apartment 14 months ago, my parents gave me some second-hand furniture from the depths of their house.  We raided the attic and pillaged the basement to find pieces that they weren't using to tide me over until I could afford things of my own; I assumed it wouldn't take long before I returned or donated everything I'd been given.

Then reality hit and I realized I had to make peace with stretching the definition of "temporary" when it comes to furnishing my apartment.  Any acquisitions I've made since April 2013 have been thanks to Craigslist, curb finds, and yard sales (like the console and side table I picked up from my parents' neighbor for $30) and I've been coming up with creative ways to make cheap and/or old pieces feel like they have a real place in the apartment.

Amongst the hand-me-downs my parents generously passed on to me were a pair of Ikea nightstands from the 80s.  One is a cupboard and the other has four drawers, and they both featured bright red plastic handles.  They are totally functional, but 30 year old white laminate looks yucky even when clean and the handles were absolutely not my style so, when I realized that I wouldn't  be replacing the nightstands for quite some time, I started thinking about making them into my next project.

Over a couple of spring weekends, I took the nightstands out to the courtyard, placing them on sheets of plastic on the grass in the sun.  I unscrewed the handles and filled in the holes with spackle.  (The holes were 6" apart, and I couldn't find handles of the same width that I liked so I knew I'd need to drill new holes for smaller handles.)  As recommended by every Ikea hack/DIY website, I started by sanding the laminate.  I then used Zinsser BIN primer to spray paint the nightstands white, using a foam brush to smooth out any drips.  Once the nightstands were dry, I put them back on either side of the bed, covered them with plastic sheeting to make sure the new paint didn't get damaged, and started plotting out the next steps.

I really wanted to stencil something pretty on the front of the nightstands.  Jon has a different aesthetic than I do so I knew I couldn't pick a design that was too floral or feminine; I emailed him a few options - this one and this one were my favorites - but he really wasn't a fan of anything he saw.  In the end, I just stuck frog tape to the front of each nightstand to create borders and then used metallic gray acryllic craft paint, leftover from the wedding signs I made last summer, to fill in the rectangles and squares.

When I texted him photos of the finished nightstands, Jon loved how angular the borders were.  I, on the other hand, thought it looked a bit too harsh.  So, on my next trip to JoAnn, I picked up a packet of Martha Stewart stencils and a little bottle of white pearl acrylic paint and went to town on my nightstand.  The finished product looks fab and it clearly partners the nightstand on Jon's side of the bed even though it has a more gentle feel.

Because of that, I got two different types of handles for our nightstands: a white one with rounded feet from Home Depot for the cabinet door on mine and four gray metal ones with all right angles from Ikea for the drawers on Jon's.  They do look like they belong together even though they're not identical and, although the borders and stencils aren't perfect, I'm so proud of my work!


 photo 866de425-8336-4c63-9efd-1c4dd8bf0e62_zpsafe0d56b.jpg

Sunday, May 11, 2014

DIY Canvas Quote Art Project


The buzzwords in the post title notwithstanding, we should start this off with a confession: I didn't get Jon a proper present for Christmas and I didn't ship anything over for his birthday last week.  (I did send him lots of chocolate hearts and a card for Valentine's Day in a red box all wrapped up with a bow, if that counts for anything!)  But honestly, there's no point in giving him something tangible while we're in geographical flux.  Either I'd buy a gift that would live in the US, unused for months, or one that I'd spend a fortune posting to him that he'll then have to figure out how to pack when he moves over.  Jon would be the first person to say that neither scenario is worth the hassle!

I did want to do something for his birthday, though, and I decided that crafting him a little present that I could enjoy in his absence would serve perfectly.  Jon's a cynical romantic - he's great at sweet gestures and has no problem with being loving publicly, but he really enjoys his sentimentality with a soupçon of misanthropy.

Nicole pinned this quotable canvas a while ago and I loved the idea of making one for Jon that matched his optimistic skepticism.  It didn't look like a difficult or expensive project and I could customize the piece with whatever words I wanted, which made it ideal for a gift that's only nominally for someone else.  So, armed with a George Bernard Shaw quote that I knew Jon would like, my list of letters (which, by the way, I transcribed incorrectly, leaving me woefully short of Ws and very grateful for my extra Ms), and a vague idea of what I imagined the finish product would look like, I hied myself to the craft store and... voila!


YOU'LL NEED:
blank painter's canvas
wooden letters
wood glue
spray paint
small foam brush
pencil
ruler

1. Arrange your quote as desired below or next to the canvas, being careful to stay within the dimensions allowed, to get an idea of how many words will fit per line.
2. Using the ruler and the pencil, draw evenly spaced lines on the canvas to ensure your words don't get acrobatic (unless, of course, you want them to).
3. Glue the wooden letters on the canvas as neatly as possible and let dry for at least 12 hours.
4. Take your canvas outside, place it on newspapers to protect the ground, and spray paint it in a steady stream from every angle, making sure to get inside and around the wooden letters; let dry for at least 12 hours.
5. If you need to do paint touch-ups, spray the spray paint into a disposable bowl and use the foam brush sparingly in the necessary spots.  Let dry for at least an hour.
6. Hang on the wall and admire!


(By the way, I loved the idea of having a white canvas but I thought it would be less forgiving of any mistakes I might make, so I decided to go with gray.  In hindsight, I wish I had chosen a lighter gray, but oh well!  You can see little splodges of glue along the sides of some letters where I used too much and it squished out against the canvas, so just be aware of that danger if you make your own.  And I got lucky with my canvas - I just guessed at the size and the whole sentence did fit, though I'd pictured more blank space around the quote.  All in all, the cost of this whole project was about $30.  And if you want to do this DIY but you have more faith in your artistic skills than I had in mine, check out Kelly's masterpiece!)


 photo 866de425-8336-4c63-9efd-1c4dd8bf0e62_zpsafe0d56b.jpg

Sunday, May 4, 2014

Menu Planning Process


I've always enjoyed meal planning.  Lists make me happy, so that aspect of mapping out the week's recipes is satisfying, but it's also enormously rewarding to open my fridge on a Sunday and see mostly bare shelves.  I feel like I've accomplished something culinarily if I've used up what I had bought the weekend prior and when I have nothing that needs to be thrown away because it's expired or gone bad.

But also, you see, if I plan my week well food-wise, I save money.

First of all, it means I only buy what I need at the grocery store.  Making a shopping list based on specific recipes encourages me to actually look through my pantry to see what I already have, a lesson I learned after finding three jars of dried thyme in my spice rack.  Second, it means I can't let my desire to be healthy trump the realities of how many vegetables I can eat in a week; it's embarrassing how many times I've bought an extra bag of spinach, convinced I'll have fresh greens with every meal, only to throw it out half-consumed.  A weekly meal plan, complete with a list of ingredients that I need, encourages me to stay away from the "oh, I could totally make this one night" purchases at the supermarket, ensuring I spend money more wisely and waste food less irresponsibly.

As I've gotten used to my new routine, working a full-time desk job again (plus a 45 minute commute each way) with delicious restaurants just steps from my office tempting me at lunchtime and occasional evening events throwing a wrench in my dinner plans, I've added another step to my weekly meal planning: updates.


I can make all the menus I want and shop only for what I really need, but sometimes life gets in the way and I don't end up eating what I meant to.  Every once in a while, my tupperware of leftovers is just too unappealing and I sneak off to grab Thai food with my colleagues.  Every once in a while, I accidentally eat my weight in pita chips and guacamole while braising the chicken thighs.  Every once in a while - well, you get the idea.  So, over the past few weeks, I've found it productive to update  my weekly meal plan with what I've actually eaten so I can keep adjusting my understanding of what's realistic given my schedule.  For instance, while I might enjoy lasagne on a week night, I now know that has to be made ahead of time because I can't stop myself from noshing while it's in the oven.  And some leftovers are fine when they're reheated for dinner, but they're not appetizing out of the microwave at lunch time.  A lot of this is common sense, of course, but I just process it more effectively when I see it all in writing.

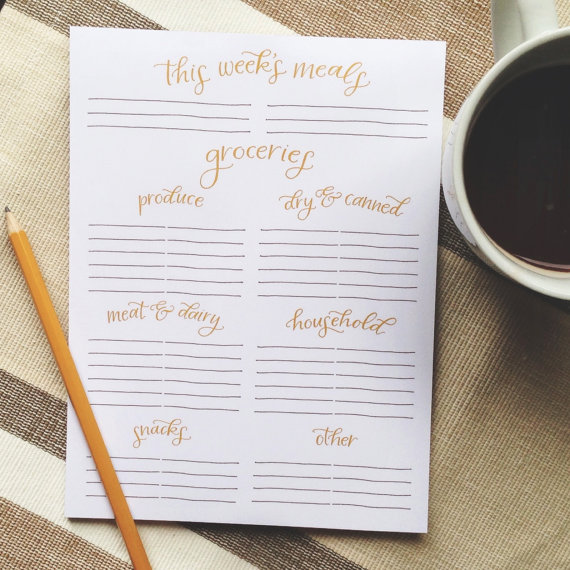
I've tried a few different types of weekly meal planners: I made my own chalkboard one with a vinyl sheet that I stuck to my fridge but I gave up on that after a few weeks because I had a hard time writing vertically; I used a small weekly calendar for a while but it didn't have room for a grocery list; and I wrote on a menu printable once but managed to lose the piece of paper three times in the span of seven days.  I love the one that Jolie at Brim Papery created, up at the top of this post, and I think I might try that next - I like the idea of a magnetic planner that can live on the fridge but with detachable pages for trips to the store.  At the moment, I'm using the wooden one you see in the collage below (and in the photo above).  I don't think it's technically a menu planner, but it's got one column that I designate for lunch and one for dinner and a notes column on the left that serves as my grocery list.  The whole notebook comes with me when I go to the supermarket so I don't lose the individual sheets and it's nice to look back on what past weeks' meals have been, especially when I need some inspiration.

Of course, Jon thinks this whole process is ridiculous and so I'm sure I'll have to tweak my methods when he gets here, but it's working for me really well right now!  Though I can always try to bring him over to Team Organization...

MEAL PLANNERS

 photo 866de425-8336-4c63-9efd-1c4dd8bf0e62_zpsafe0d56b.jpg

Sunday, April 27, 2014

A Common Flower Girl*


There are two contradictory things you should know about me.  One, I love having fresh flowers in my home; and two, I have absolutely no skill when it comes to arranging cut stems.

It's quite an upsetting combination, as I'm sure you can imagine.

Since I moved out of my parents' house and into my own apartment, I've made it a priority to always have something blooming in my home.  (Jon doesn't understand this from a financial perspective.  Why would I choose a bouquet over happy hour with friends?  It's just that important to me!)  Winter's options were a bit repetitive, but it's been so much fun to pick and choose different flowers now that spring is here.

I learned relatively quickly, though, that I can't get carried away when at the farmers market or flower shop.  My sixth grade art teacher told me that I have a vivid imagination but my hands can't keep up; because I am horrible at arranging mixed bouquets, I have to give myself some strict parameters to ensure I don't come home with a riot of flowers that I'll wouldn't be able to display.

First of all, I generally only buy one type of flower and I usually choose quantity over quality so I can fill a vase - no great sacrifice in spring when everything is pretty, to be honest.  Second, if I do get creative, I stick within one color family so that my lack of skill isn't as evident once the flowers are out of their paper wrapper.  My apartment is small enough that I have to take the color of my dining room walls into consideration when choosing blooms that will live in my living room, further limiting my options.  I might not end up with the most exciting flowers, but they always make me happy!


I've learned a few things about keeping cut stems vibrant for as long as possible...

1. Once you get home, trim the stems on the diagonal before putting them in water - this provides more surface area for drinking - and cut them under running water so that air doesn't get into the stem.  Use a sharp knife rather than scissors, which squish the stem while cutting.  (That's a bad thing.)

2. Make sure to remove all of the leaves that will be below the water line.  Leaves rot quickly, and your flowers won't last as long as they might otherwise if they're in yucky water.

3. Cut flowers keep longer if placed in a cooler part of the house out of direct sunlight, so avoid putting vases next to appliances that emit heat or on windowsills.

4. Change the water in the vase every other day rather than just when the water gets low, and cut the bottom of the stems again before you put them in the fresh water.

5. Use flower food every time you change the water.  There are lots of old wives' tales about tinctures made with aspirin, vinegar, and bleach, and we've all heard that you're supposed to drop a penny into the bottom of a vase, but those little packets of mysterious white powder really do provide the best nutrients for your flowers.  Don't be afraid to ask for a few extras when buying your bouquet!

Also, your florist (or the guy at the farmers market) might have suggestions specific to the type of flowers you're buying.  I was advised on Friday that hydrangeas last longer if you put them in warm water, and someone told me last spring that tulips won't flop as much if you keep them in their paper wrapper for the first few hours after you put them in a vase.

You get 1,406 hits if you search for "arranging flowers" on Martha Stewart, so maybe I'll be brave enough to try my hand at that next spring.  For now, I'm just enjoying my simple bouquets - and beaming with pride when they live longer than I'd expected!

*That's what Professor Higgins and his mother call Eliza Doolittle in My Fair Lady.
 photo 866de425-8336-4c63-9efd-1c4dd8bf0e62_zpsafe0d56b.jpg

Thursday, March 20, 2014

Happy Spring!

Oh, it is happy!  At least, spring and I will be happy until next Tuesday, when they're predicting another cold front and, potentially, snow in the DC area.  Regardless, it's now officially spring, and I no longer feel like the new wreath I made the other week is mocking me every time I approach my front door, be-gloved and wrapped up tight against the unseasonable weather.

These DIY wreaths are a new thing for me - the craft bug bit me hard as I prepared for our wedding and, though I assumed I'd get over it once the big day had passed, my magnetic north seems to have shifted towards Michaels and JoAnn.  The one hanging on my door now is the fifth I've made since September, which means I have a grasp of what does and doesn't work and, perhaps more importantly, what I can and can't do with my own two hands.

I almost always have an idea in my head of what I want before I turn to Pinterest for examples and tutorials, but I do like to see what others have made and how.  I haven't worked on anything complicated enough yet that I've had to follow instructions; seeing finished products made by other amateurs just helps boost my confidence in my newly-acquired DIY skills.

That being said, I'm very proud of my newest wreath and I'd love to show you how it came to be!  It took much longer than I expected - gluing the moss to the foam wreath took an hour and a half and next time I'd probably use Modge Podge instead of a hot glue gun for that step - but I used much less moss (one bag containing 108 in³ rather than the three I'd bought) and fewer stems of fabric flowers, so the whole thing was cheaper than I'd expected once I returned the extras.  All told, the whole project was pretty simple!

Some of my wreaths have been embarrassing - the Halloween and Christmas ones come immediately to mind - but I'm okay with that because it means I have an excuse to make new ones for those seasons/holidays next year.  This wreath, though, I think I'll keep around.


 photo 866de425-8336-4c63-9efd-1c4dd8bf0e62_zpsafe0d56b.jpg

Tuesday, March 18, 2014

Come On In (Again)

I made a lot of noise about using Mondays in March for posts about blogging following my break and with help from your amazing responses to my survey, but I couldn't manage to get yesterday's draft into publishable form.  It worked well to focus just on that first question about what it means to be a blogger for last week's post; your thoughts on the other issues were actually all fascinatingly intertwined and so I wanted to guide them into one narrative post, but the draft felt too unwieldy and at a certain point I had to step away.  I'll keep working on it for next week, dear readers!

Anyway, for today's regularly scheduled post I wanted to welcome you (back) into my home!


A lot of the furniture in my apartment is temporary.  "Temporary" can have many definitions, as anyone who has ever set up a home on a budget knows, and I'm sure that we'll bring some of the pieces I have now - Craiglist finds, curbside scores, and hand-me-downs - to our next home, but that doesn't stop me from dreaming about more permanent possibilities!

At the moment, I'm fantasizing about upgrading our entry.  It might sound like a strange project, but you actually walk into a room that measures 7'x7' when you come through my front door - that's a lot of space to play with when the rest of the apartment is technically a studio!  The set up I have now works, definitely, but it won't really when Jon gets here.  Do you see that door just to the left of the front door?  Well, it's meant to be a walk-in closet, but we're going to turn those 36 sq ft into an office for Jon.  (The credit for that idea goes to Beth!)  Management has given us permission to remove the door to the closet, because the space would be way too claustrophobic otherwise, and that means we'll have to rearrange the contents of the entry a bit so Jon's not faced with a jumble of coats and leashes as he tries to work or read or whatever it is that men do in their studies when hiding from their wives and dogs.

My plan is to take down that panel of hooks, bought through Joss & Main back when I first moved into the apartment, and to use that wall to hang some of our art.  I imagine that the wide expanse of wall just opposite - currently empty - will be the new home for these pretty coat hooks and that gorgeous tufted metal bench.  (The front door is set far enough out from that wall so there's plenty of room.)  We'll replace the pine console, refinished by my mother about two decades ago, with a more angular one made of metal and glass and move the canvas bin into a closet.  Since we'll lose some storage in the process, we'll get a few attractive baskets to go under the table to hold Charlie's bags and things.  Since I first gave you a tour of my apartment back in May, I've acquired a big gorgeous mirror from Target that was, for reasons passing all understanding, on clearance for $35, and that will remain where it is, over the console; I'm not sure where the rubber mat will make its new home - maybe under the bench, so boots and shoes are still accessible and near the coats.  The picture frame will keep its place of honor on the console and will be joined by this handsome wooden tray, which will replace the key basket and mail sorter to serve as a catchall.  That's how it will all eventually look in my dreams, anyway!  What do you think?


COME ON IN

 photo 866de425-8336-4c63-9efd-1c4dd8bf0e62_zpsafe0d56b.jpg

Sunday, January 26, 2014

My Refrigerator, My Soul

I love it when bloggers get real about their lives - not about what they think, because at this point I take it as a given that I'll read honest words, but about how they actually live.  We see so many styled bedside tables and curated jewelry trays that it's easy to think you're the only girl who has a small collection of dried contacts next to her alarm clock and who sometimes throws her silver earrings into the gold side of the box.  It's incredibly comforting when a blogger shares her personal space as it usually is, unprepared for a photo shoot!  That's why Whitney got so many enthusiastic responses to her real house reveal last January and why Real Simple's #rsgetreal week on Instagram earlier in January was so popular - I don't know about yours, but my "OMG so busy" desk more often looks like this than this or even this.  Aspirational living can be invigorating but it can also be exhausting, and it's nice to relax for a bit in the realization that there's nothing wrong with not constantly striving for neater or prettier.

It might seem strange to those of you who aren't big cooks, but the best way I can show you how I actually live is by opening my refrigerator.  You've all seen my hauls from the farmers market, heavy laden with fruits and vegetables, and I've Instagrammed my lazy night Kraft mac & cheese dinners, but the way I usually live is somewhere in the middle of those two extremes.  Because I love cooking (and I unapologetically cook what I enjoy making and eating, like this chocolate chip breakfast loaf and this feta/spinach soufflĂ©, even when I'm actively trying to lose weight), giving you a peek into my fridge is like glimpsing my soul.

The topic of today's post was a spontaneous decision so, in case you were wondering, I didn't have time to edit the contents at all; it was inspired by tomorrow's post, which is all about leftovers. Ironically, I don't have many leftovers in the fridge at the moment, but I thought it might be revealing for you to see what I work with on a daily basis anyway!  I'm tempted to give you lots of explanations and excuses as to what I bought for which recipe and why I keep it wherever it's living at the moment, but that sort of defeats the purpose of a candid post, doesn't it?  So, without further ado, I open my refrigerator to you, dear readers.


 photo 866de425-8336-4c63-9efd-1c4dd8bf0e62_zpsafe0d56b.jpg