Showing posts with label entertaining and recipes. Show all posts

Tuesday, September 15, 2015

Bake Off Bake Along: Frangipane

With the ongoing renovations to our building and the related logistical hopscotch that we're playing - it's too stressful for Charlie to stay in our apartment with construction crews coming in and out, so he and I are spending large chunks of the week with my parents in the 'burbs while Jon holds down the fort in DC - I haven't been able to do much cooking. This past weekend, though, the three of us camped out at home, and I got my fill of braising, breakfasting, and, happily, baking.

That's right, dear readers: I'm back in the competition for the Bake Off Bake Along hosted by Amanda and Ala! This week's signature challenge, the frangipane, was perfect for Rosh Hashanah, a Jewish holiday when we eat apples and honey to welcome the sweet new year on which we embark. I used a Williams Sonoma recipe but made mine with phyllo dough (as I couldn't find any puff pastry at the supermarket and didn't want to use pie crust) and was delighted with the resulting light and flaky tart.

May your year be as sweet! Shana tovah - have a wonderful new year.


Tuesday, August 18, 2015

Bake Off Bake Along: Biscotti


We're on week two of the Great British Bake Off, and the theme is cookies - sorry, biscuits, since the show is set in England! The three challenges were biscotti, arlettes, and a biscuit box made of biscuits.

As before, I went for the classic choice with a little twist: gingerbread biscotti. I last made Smitten Kitchen's recipe in the winter, when the biscotti were delicious dunked in hot chocolate, but I thought they'd also make a fab summer treat served with ice cream and grilled peaches. And, dear readers, they were!


Tuesday, August 11, 2015

Bake Off Bake Along: Madeira Cake


Here's how I described The Great British Bake Off to my colleagues when I presented them with half a Madeira cake yesterday morning: it's a baking contest and it's incredibly competitive, but it's also twee and old-fashioned while being self-aware of how hip it actually is.

From the GBBO website:
The Great British Bake Off is the ultimate baking battle where passionate amateur baking fans compete to be crowned the UK’s Best Amateur Baker. Over the course of 10 hour-long episodes, the series follows the trials and tribulations of the competitors, young and old, from every background and every corner of Britain, as they attempt to prove their baking prowess. Each week the bakers tackle a different baking skill, which become progressively more difficult as the competition unfolds.
It's tremendously fun watching, if you can tune into the BBC by legal means (ahem... or otherwise)!
In every episode, the bakers have three challenges: signature, technical, and showstopper. Lots of fans are baking along with the show, and Amanda and Ala, to show their deep and abiding love for GBBO, are hosting a bloggers' Bake Off Bake Along for the duration of the show - and of course I wanted in! As my baking skills (and tastes) are more classic than creative, I suspect I'll most often be making the signature recipe in each episode. Last week, that was the traditional Madeira cake.

It must be admitted that, while my Madeira cake was delicious, it probably wouldn't advance me to the next round of the competition. I used the BBC recipe and it didn't rise nearly as much as it should have or sport that gorgeous tectonic crack down the middle that you should see on loaf cakes. But it was yummy - especially when topped with blackberry coulis (made from the blackberries I picked on Sunday) and homemade lemon curd!

Madeira Cake - as per the BBC
makes 12 slices; 6 Weight Watchers pointsplus per slice

Blackberry Coulis - as per the BBC
makes 12 servings; 1 Weight Watchers pointsplus per teaspoon

Lemon Curd - as per Smitten Kitchen
makes about 2 cups; 1 Weight Watchers pointsplus per teaspoon


Tuesday, August 4, 2015

Zucchini Lasagna


Over the last few months, Jon's evening shifts have been opportunities for me to make super healthy dinners - dinners that Jon would feel were a punishment if he had to eat them. He's not anti-health by any means, but he's definitely a meat/starch/veggie guy and most Pinterest-worthy or Weight Watchers-inspired recipes send him scowling to the hills. Any pasta-based meal where the carbs are replaced by zucchini, therefore, is definitely off the menu when we're eating together.

So, the other night, I took advantage of one of Jon's night shifts to try my hand at zucchini lasagna using this New York Times recipe as a starting point and working with what I had in the fridge and pantry. (After the lasagna pizza I made a few weeks ago, it was time for something closer to the real deal!) The dish made four portions; I only had one helping on my own that night, so Jon and I ended up sharing another two the next night and I'm delighted to say he loved it. And then the last serving was used as the base for a brunch of baked eggs with crusty bread. It was delish, both on its own and repurposed! I'lll definitely be making this again.

Zucchini Lasagna

serves 4
(I've altered the recipe slightly from what I made in terms of quantities and order of layers, which you'll realize when you see the photo of my finished dish at the bottom. Learn from my experimenting!)

1 onion, diced
3 tbs minced garlic
1 tbs red chili flakes
28 oz can of tomato paste
dried herbs, mixed
2 huge or 4 medium zucchini
6 links pre-cooked chicken sausage (I used al fresco's roasted pepper and asiago)
8 oz crumbled feta or goat cheese
olive oil
salt and pepper

Heat oven to 450°. Line 2 sheet pans with parchment paper. Trim ends off zucchini and fillet into lengthwise slices, about 1/4 to 1/3 inch thick. Season on both sides with salt and pepper and toss with 2 tablespoons olive oil. Arrange zucchini slices on baking sheets in one layer and roast for 12 minutes, until lightly browned and easily pierced with a knife. Remove from oven and reduce heat to 375°.

While the zucchini is roasting, sautée the diced onions in a deep pan over medium high heat with a little olive oil. After 5 minutes, once the onions have softened and started becoming translucent, add the garlic and cook for another two minutes, stirring frequently so the onions and garlic don't stick to the bottom of the pan. Add the chili flakes and mix with the onion/garlic, and then add the tomato paste, combining well. Add herbs as desired and continue to stir for another 5 minutes.

Let the zucchini cool once it's out of the oven; turn the heat off on the sautée pan. Slice the chicken sausage into rounds and set aside.

Oil the bottom of a casserole dish. Spread a layer of tomato sauce on the bottom, about 1/3 of the mixture. Top with a layer of zucchini (half of the slices you have), then a layer of chicken sausage (half of the slices you have), then a layer of crumbled cheese (1/3 of what you have). Repeat the sauce/zucchini/sausage/cheese layering a second time, then top with a last layer of sauce and the remaining cheese. Drizzle on some more olive oil. Bake at 375° for about 35 minutes, until the sauce is bubbling and the cheese is golden, and then serve and enjoy!


Thursday, July 16, 2015

Flatbread Lasagna Pizza


Dear readers, I am so proud of the dinner I made tonight. We didn't have much in the fridge, I didn't want to go to the grocery store, and neither of us felt like doing real cooking. So what did we have? Homemade pizza!

Jon called it a pizza lasagne, actually - with tomato paste, goats cheese, spinach, onions, ground beef, and tomatoes all layered, I guess it is basically like a flatbread version of the pasta dish. When I sautéed the onions and ground beef, I added salt and pepper and a few shakes of mixed dried Italian herb seasoning. And that's it! That's all the cooking involved in this. Layer everything up, pop the flatbreads into the oven at 400° for about 20 minutes, and you're done! Serve, enjoy, and feel very proud of yourself. (And then, maybe, blog about it.)


Tuesday, June 30, 2015

Summer Veggies


Before my stint in Paris, my grandmother shared some concerns with me. (Of course she did; she's Nana. It's what she does. That and love me despite the concerns.) I've forgotten most of her admonitions/suggestions, but I will never forget how scandalized she was when she realized I was moving to France for eight months and didn't like zucchini, eggplant, or tomatoes. It would be, she predicted, a real problem.

Fast forward eight years, and I love all three. I'm not sure we can credit the market at Place Monge in the 5th for that, but I haven't looked back since! My farmers' market haul at this time of year always includes zucchini and summer squash (and cherry tomatoes, if they don't cost a fortune, though I often buy them in bulk from Costco because I pop them like tic-tacs.) And, now that I've discovered the joys of my mandolin, we're eating ratatouille either baked or braised for at least a few meals every week. I usually make up the recipe as I go along - here's what tonight's dish looks like:

Ratatouille Tart

1 box phyllo dough
2 zucchini
2 summer squash
3 baby eggplants
1/2 lbs ricotta
salt, pepper, herbs, chili flakes
olive oil

Preheat oven to 400º. Brush a baking dish with olive oil and place the phyllo dough inside, making sure the dough is square in the corners and flush against the sides. (There should be extra dough overhanging the edges - this is a good thing!) Brush the phyllo dough with olive oil and spread half the ricotta evenly on top. Layer rounds of the vegetables over that, and then sprinkle with salt, pepper, and herbs and/or chili flakes as desired. Add a second level of ricotta and then another layer of vegetables. Top with salt, pepper, and herbs and/or chili flakes as desired. Fold the extra phyllo dough over the top to enclose the casserole and brush all over with olive oil. Bake for 25 minutes or until nicely golden. Serve and enjoy!


If you want more established recipes, here are two of my favorites:
Smitten Kitchen's Ratatouille Tart
Alice Waters' Ratatouille
What are yours, dear readers? Please share - I'd love some new ideas!

 photo 866de425-8336-4c63-9efd-1c4dd8bf0e62_zpsafe0d56b.jpg

Tuesday, February 24, 2015

Easy Not-Too-Sweet Granola


It's still absolutely freezing in DC, which generally calls for hot breakfasts: oatmeal, cinnamon raisin bagels toasted with cream cheese, those reduced-fat turkey bacon sandwiches from Starbucks... Unfortunately, though, most of my favorite hot breakfast options start the day off on a really heavy note.  Even Weight Watchers-friendly oatmeal feels too dense for right now.  I want light!  I want fresh!  I want spring!

Ah, there's the crux of it - I want spring.  I want weather that doesn't demand comfort food.  And that, at the moment, seems impossibly far away.

So let's fake it, shall we?  Cook light and the warm weather shall come.  And therefore I give you my new (cobbled together from a few different recipes around the web using things I already had in the house) granola.  Sprinkled over half a cup of fat-free Greek yogurt with a sliced banana, half a cup of this delicately sweet and perfectly crunchy granola brings us to a 6 PlusPoint breakfast and, hopefully, spring.

Apple Sauce Granola
serves 12

2c Cheerios
3c quick oats
6 tbs honey
1/2 tbs vegetable oil
1/2 tsp ground cinnamon
1/2 tsp ground ginger
1/2 tsp vanilla extract
113g unsweetened apple sauce

Preheat oven to 350°F.  Spread the Cheerios and quick oats out on a rimmed baking sheet and bake for 12 minutes, tossing once halfway through.

Meanwhile, mix all the other ingredients together in a medium bowl.  When the grains come out of the oven, pour them into the bowl and combine well.  Spread the granola evenly across the baking sheet, trying to keep as many clumps together as possible and bake again for 15 minutes, tossing once again and checking regularly in the last 5 minutes.  You want the granola to get as brown as possible without burning.  Remove from the oven, let cool, and enjoy as preferred!


Sunday, February 8, 2015

Beef Stew For Both Of Us


If you follow me on Twitter and Instagram, you'll know I started Weight Watchers at the end of October - and I'm thrilled with it.  (There's no way I would have been mindful of what I was eating over Thanksgiving and through two Christmas-filled weeks in England without it!)  During January, though, I got stuck on a plateau, and a poke around the website and conversations with a few other members encouraged me to try Simply Filling for a week.  Simply Filling is a sort of side program WW offers wherein you eat only from a list of "power foods" that you don't have to track; the idea is that Simply Filling foods are easier for you to regulate on your own because they're natural and satisfying and are therefore less prone to provoking binges in the way that, say, a bag of chips might be.

Now, my husband and I both love enjoying a homecooked meal together at the end of the day, but "Weight Watchers" and "natural and satisfying" are not phrases that sends a thrill down Jon's spine.  My challenge, then, was to follow or create SF-endorsed recipes that Jon would like (or that he could easily doctor) so that we didn't have to make two different dinners every night and we could share meals.  The most successful from the past week, which we'll definitely be making again, was this basic beef stew.  We had it over brown rice on the first night, with a under a blanket of mashed potatoes another night, as a sort of bolognese with spaghetti squash another night - the possibilities are endless.  Jon usually doused his portion in Sriracha, mixed in chili flakes, or sprinkled cheese on top, but he agreed it was delicious even plain as I ate it!

Basic Beef Stew
makes 8 portions

2 tbs olive oil*
2 onions, diced
2 tbs garlic, minced
1lbs 95% lean ground beef
30 oz petite diced tomatoes
16oz baby bella mushrooms, sliced
8oz baby carrots, cut into rounds
1c peas (defrosted and drained if frozen)**
1/2c reduced sodium chicken broth
salt, pepper, and whatever dried herbs you want to taste***

Heat the olive oil over medium-high heat in a Dutch oven.  Add the onions and sauté for five minutes, stirring frequently.  Add the garlic and cook for another few minutes, still stirring, and then add the beef.  Mix all three together to coat the beef in the onion/garlic and then cook until the meat is almost done, stirring occasionally and making sure to scrape up any bits that stick to the bottom of the pot.  Add the tomatoes (with any juices that mat be in the can), the mushrooms, the carrots, and the peas, and combine well.  Pour in the broth, reduce the heat to low, and simmer for at least 20 minutes.  Add salt, pepper, and seasonings to taste - and then enjoy!

*Simply Filling allows 2 tablespoons of oil per day
**I didn't actually use peas but I should have so I'm including them in this recipe!  You could also add beans if you wanted to bulk up the recipe (and therefore make more portions out of it).
***I added about two teaspoons of an Italian seasonings blend but this could be made with almost any cuisine in mind


Sunday, December 7, 2014

Apples and Bananas (and Chocolate Chips, Oh My!)


Every banana bread recipe I have ever seen demands three or four bananas.  You know what I didn't have when I decided to make banana bread?  Three or four bananas.

But the two bananas that were turning brown in the fruit basket on top of our fridge desperately needed to be put to use, so I got a little creative.  I remembered that I had a few cups of apple sauce in the pantry left over after from when I made gluten-free vegan blueberry muffins for my colleagues; the texture of a smooshed up over-ripe banana isn't too different from the texture of apple sauce, so I thought a substitution was worth a try!  And, just to distract in case the experiment didn't work, I also threw a bag of chocolate chips into the batter and sprinkled cinnamon sugar on the tops of the muffins before sliding the pan into the oven.

Dear readers, I am delighted to report that I have a new favorite banana bread recipe.


Chocolate Chip Banana Apple Muffins (With Cinnamon Sugar)
From Mark Bittman

8 tbs (1 stick) butter
2 c all-purpose flour
1 tsp salt
1 1/2 tsp baking powder
3/4 c sugar
2 eggs
2 very ripe bananas, mashed with a fork until smooth
1/2 c apple sauce
1 tsp vanilla extract
2 c chocolate chips
6 tsp cinnamon sugar

Heat the oven to 350 degrees.  Line a muffin tin with paper cupcake wrappers

Mix together the dry ingredients.  With a whisk, cream the butter and beat in the eggs, bananas, and apple sauce. Stir this mixture into the dry ingredients; stir just enough to combine. Gently stir in the vanilla and chocolate chips.

Pour the batter into the muffin cups and sprinkle with the cinnamon sugar, about 1/2 tsp per muffin. Bake for 45 to 60 minutes, until nicely browned. A toothpick inserted into the center of the muffin will come out fairly clean when it is done, but because of the bananas this bread will remain moister than most. Do not overcook. Cool on a rack for 15 minutes before removing from the pan.

Monday, November 24, 2014

Lessons from the Kitchen: French Onion Soup


I've posted a couple of Instagrams since Jon moved to DC that have alluded to the fact that Jon and I have very different cooking styles and so we rarely cook together.  To be honest, the real issue is that I'm a control freak and I can't share without micromanaging, but beyond that we do subscribe to different schools of thought when it comes to cooking.  I'm not always terribly adventurous when it comes to experimenting; Jon, on the other hand, is a everything-but-the-kitchen-sink kind of cook.

It drives me crazy, and a crazy woman in the kitchen is a recipe for disaster.

(See what I did there?  I am so clever.)

Anyway, over the weekend I followed not one but two of Jon's culinary suggestions, and let me tell you: the result was delicious.

When he came to visit last April, we hosted a seder and, after the meal, scooped up all of the gravy and leftover bits of carrots and onions and beef from the brisket pan and put it in tupperware and froze it.  When we had my parents and sister over for dinner in October, we made the chicken carcass into stock and, though I was wary, we dumped almost all of the leftovers from the roasting pan into the pot to flavor it - vegetables, stuffing, and all - and then put that into tupperware and froze it, too.

This weekend we decided to make French onion soup and, instead of putting in the suggested eight cups of beef stock, we used what we had in the freezer: four cups of that super rich chicken/vegetable/stuffing stock plus four cups of the brisket bits, pureed in the Cuisinart.

Oh my goodness, dear readers.  We topped it with slices of toasted asiago bread piled high with grated cheese, and it was the most decadent French onion soup I've ever had.   Even more notably, though, I admitted to Jon that, sometimes, everything but the kitchen sink tastes pretty good.


Sunday, August 31, 2014

A Birthday Feast


After 10 years of throwing dinner parties, exploring my culinary skills and learning the hard way that timing is everything, I think that, at the ripe old age of 28, I have finally found my ideal birthday meal.

Actually, food aside, let me tell you before I say anything else that Friday night was absolutely wonderful.  Seven friends from totally different pieces of my life gathered in my apartment after work to help me celebrate my birthday, and it just felt like all my worlds were fitting together seamlessly.

Because I knew I wanted to spend as much time with my guests as possible, I planned the meal with the goal of minimizing the energy I'd have to spend in the kitchen on Friday evening.  I decided to make ratatouille and a roasted leg of lamb, dishes that are labor-intensive but that are even better when prepared ahead of time, served with a crusty baguette.  In the middle of dinner, one of the girls asked where I'd found the recipes, and it made me super sentimental to realize that I'd discovered each at various phases of my adult life.

I didn't really like zucchini, eggplant, or tomatoes growing up; I finally accepted them as potential ingredients when I lived in Paris, but it wasn't until my friend Christine made ratatouille in summer 2009, when we lived together in London, that I truly understood the glory that could be achieved with those humble vegetables.  Despite insisting that I wouldn't like ratatouille, I found myself sneaking bites of the braising vegetables as they simmered on the stove.  It inspired an imaginary Pixar moment and I was immediately converted to the cult of ratatouille.  Soon after I moved back to DC from London in summer 2012, I created my own recipe, amalgamated from a few I found online, and it's been an integral part of every summer since.  When I made it for this party, I prepared it on Thursday night up through the step in the recipe when you combine all of the vegetables in the Dutch oven, after which I put the pot in the fridge to sit until Friday evening, when I heaved it back onto the stovetop and simmered the vegetables for nearly two hours over low heat.

The lamb - oh, the lamb!  Every time I roast a leg of lamb, I thank God for the friendly butcher at the Columbus Circle Whole Foods who, in early 2005, took pity on my ambition and told me how to make the best marinade ever.  I'd moved to New York for college a few months prior and my grandparents let me have a dinner party in their gorgeous Upper West Side apartment while they were out of town.  I felt terribly grown up and decided that only the most elegant meal would do.  Facing the meat counter at Whole Foods, I was bewitched by the butterflied leg of lamb.  The below recipe comes directly from the butcher who helped me nearly a decade ago!

Roast Lamb
serves 8 with leftovers

4.5lbs boneless butterflied leg of lam
hearty splash of olive oil
2 tbs pesto
2 tbs minced sun dried tomatoes
4 tbs grated parmesan cheese
fresh rosemary
fresh thyme
salt and pepper

Mix the ingredients for the marinade well together in a big bowl.  (Go easy on the salt if you're using store-bought pesto, like I did, and if your jar of sun dried tomatoes is marinated in heavily-seasoned oil.)  Rinse the lamb and pat it dry, picking off any big globs of fat; you do want to leave a thin layer of fat, though, to keep the lamb from drying out in the oven.  Place the lamb in the bowl and work the marinade into the meat, making sure to cover every surface and get it into all crevasses.  You'll want to use your hands for this!  Cover the bowl with clingfilm and place in the refrigerator for at least two hours.  (I prepared the lamb before I left for work on Friday morning, so it soaked up the marinade for about 10 hours.)

Preheat the oven to 425°F/220°C and take the lamb out of the fridge to bring it to room temperature.  When the oven is ready, place the lamb in a tray with high sides and roast for about 90 minutes.  Check the lamb every so often and baste with the accumulated juiced from the bottom of the pan.  For lamb just on the pink side of medium, the internal temperature should be 140°F.  Once it's done, take it out of the oven and cover with foil, letting it rest for 10 minutes.  Then carve, serve, and enjoy!

 photo 866de425-8336-4c63-9efd-1c4dd8bf0e62_zpsafe0d56b.jpg

Sunday, June 15, 2014

Scotch Eggs

Scotch eggs, a staple of the British gastropub menu, are either phenomenally delicious or they're not worth eating.  If you've never had one, just take my word for it: it's nearly impossible to enjoy a Scotch egg that can only be described as "decent."  But what, you ask, is a Scotch egg?


Essentially, a Scotch egg is a hard boiled egg wrapped in sausage meat, herbs, and breadcrumbs, and fried. Here's what Jon has to say about them:
Just last weekend I was in rural Suffolk visiting my parents, and we went to the delightful farmer's market at Snape Maltings. The whole place made me happy because, although it was full of the most Instagram-friendly foodstuffs imaginable, no-one was tweeting photos of the artisanal pesto cheese biscuits because Suffolk doesn't stand for that sort of nonsense - we just eat our pretentious foods in these 'ere parts. There was a stall selling monster Scotch eggs for £3.50 each, all organic, naturally. We took them home, heated them up and had them for lunch with rocket salad. They were so huge that we actually struggled to finish them, tasty though they were. If you were to have some kind of Man Vs Scotch Egg TV show, this would definitely be the first episode.
But how, you ask, could bad things ever be associated with this magical melding of cold egg and cheap porcine offcuts? Well, you have clearly never been introduced to the dubious delights of the Tesco Metro plastic wrapped Scotch egg product. I don't want to condemn this modest offering excessively, for as long as you know where you stand with one of these you'll do ok. The ideal time to consume one is on a hot sunny day in the park with good company; as you reach for your fifth can of pear cider, with a sense of bonhomie clouding your every judgement, it seems like the right thing to do. The same thing consumed during your office lunch break in mid-February is a very different beast, however. Between mouthfuls of grey, anonymous meaty gristle and clammy, solid hardboiled egg, you confront your failures as a human being and contemplate how you came to be in this scenario yet again, the healthy salad-consuming intentions of January idly tossed aside in favour of the instant gratification that you told yourself this Scotch egg, alone, would bring.   
For some reason, I was overcome last week with a craving for Scotch eggs.  So, armed with Jon's well-wishes, my debatable culinary standards, and a few classic recipes to guide me, I decided to make my own.  I brought them for our Father's Day picnic lunch at the beach yesterday and they were delicious!


6 eggs
10 sausage links (350g, 12 oz)
fresh parsley, chopped
fresh rosemary, chopped
fresh thyme, chopped
pinch nutmeg
1 tbs English mustard
¾ c flour
¾ c breadcrumbs
salt and pepper
1 c vegetable oil

Place four of the eggs, still in their shells, in a pot of cold salted water. Bring to a boil, lower the heat, and simmer for six minutes. Remove from heat, drain, and immediately run under cold water.

Remove the sausages from their casing and mix the meat well with the herbs, nutmeg, mustard, and a dash of salt and pepper.

Peel the four hard-boiled eggs. Put the flour in one bowl, mixing in another dash of salt and pepper, and the breadcrumbs in another; beat the two leftover eggs in a third bowl.

Take ¼ of the sausage mixture, roll it into a ball, and then flatten it on a piece of cling film (or, if you’re in America, Saran wrap). Coast a hard-boiled egg in flour and place it in the center of the sausage mixture oval. Bring up the edges of the cling film to encase the egg in the sausage mixture, using your fingers to pull together and smooth out any gaps or bumps. Dip the egg/sausage in flour, then in the beaten egg, then in breadcrumbs, then in another coat of the beaten egg, and then in a final coat of breadcrumbs. Set aside and repeat with the remaining hardboiled eggs.

Heat the oil in a heavy skillet until a flick of water sizzles when dropped in. Lower the Scotch eggs into the skillet carefully and cook on all sides until evenly brown, a total of 7-8 minutes. Remove from the oil with a slotted spoon and place on paper towels to dry and cool.

Best eaten cool or at room temperature and served with salad and cheese, preferably, as Jon suggests, on a hot sunny day in the park with good company!
 photo 866de425-8336-4c63-9efd-1c4dd8bf0e62_zpsafe0d56b.jpg

Monday, May 26, 2014

Loves Tastes Like Strawberries


Love tastes likes strawberries.  More specifically, ripe strawberries taste like first love - that heady, delirious, ungovernable rush of being plunged headfirst into something you'd read about but didn't know could actually be so glorious in real life.

That's what strawberries taste like when they're in season.

They're so lush that I can't bring myself to buy strawberries at the supermarket before May or after September.  They're just not the same.  (They're not really in season after mid-July, but first love is nothing if not foolish and optimistic, naively hoping that everything will be as it was even after it's over.)    And so, starting in late May, I go a bit strawberry-mad.

I can eat them like candy out of the colander, still damp from a quick rinse, but it's even more fun to bake with them.  Scones, breads, crumbles, cakes, tarts - the possibilities are endless!  I've made variations on all of the below except for the second, and I plan on putting Marissa's recipe to the test tonight so I can bring a post-holiday treat into work tomorrow.  As you might imagine, the scones I made yesterday are almost all gone already!  I have managed to save a few chocolate-dipped ones for later, but I'm not sure how much longer they'll last...


Share your favorite strawberry recipes, dear readers!  We must make the most of these next few strawberry weeks.

 photo 866de425-8336-4c63-9efd-1c4dd8bf0e62_zpsafe0d56b.jpg

Sunday, May 4, 2014

Menu Planning Process


I've always enjoyed meal planning.  Lists make me happy, so that aspect of mapping out the week's recipes is satisfying, but it's also enormously rewarding to open my fridge on a Sunday and see mostly bare shelves.  I feel like I've accomplished something culinarily if I've used up what I had bought the weekend prior and when I have nothing that needs to be thrown away because it's expired or gone bad.

But also, you see, if I plan my week well food-wise, I save money.

First of all, it means I only buy what I need at the grocery store.  Making a shopping list based on specific recipes encourages me to actually look through my pantry to see what I already have, a lesson I learned after finding three jars of dried thyme in my spice rack.  Second, it means I can't let my desire to be healthy trump the realities of how many vegetables I can eat in a week; it's embarrassing how many times I've bought an extra bag of spinach, convinced I'll have fresh greens with every meal, only to throw it out half-consumed.  A weekly meal plan, complete with a list of ingredients that I need, encourages me to stay away from the "oh, I could totally make this one night" purchases at the supermarket, ensuring I spend money more wisely and waste food less irresponsibly.

As I've gotten used to my new routine, working a full-time desk job again (plus a 45 minute commute each way) with delicious restaurants just steps from my office tempting me at lunchtime and occasional evening events throwing a wrench in my dinner plans, I've added another step to my weekly meal planning: updates.


I can make all the menus I want and shop only for what I really need, but sometimes life gets in the way and I don't end up eating what I meant to.  Every once in a while, my tupperware of leftovers is just too unappealing and I sneak off to grab Thai food with my colleagues.  Every once in a while, I accidentally eat my weight in pita chips and guacamole while braising the chicken thighs.  Every once in a while - well, you get the idea.  So, over the past few weeks, I've found it productive to update  my weekly meal plan with what I've actually eaten so I can keep adjusting my understanding of what's realistic given my schedule.  For instance, while I might enjoy lasagne on a week night, I now know that has to be made ahead of time because I can't stop myself from noshing while it's in the oven.  And some leftovers are fine when they're reheated for dinner, but they're not appetizing out of the microwave at lunch time.  A lot of this is common sense, of course, but I just process it more effectively when I see it all in writing.

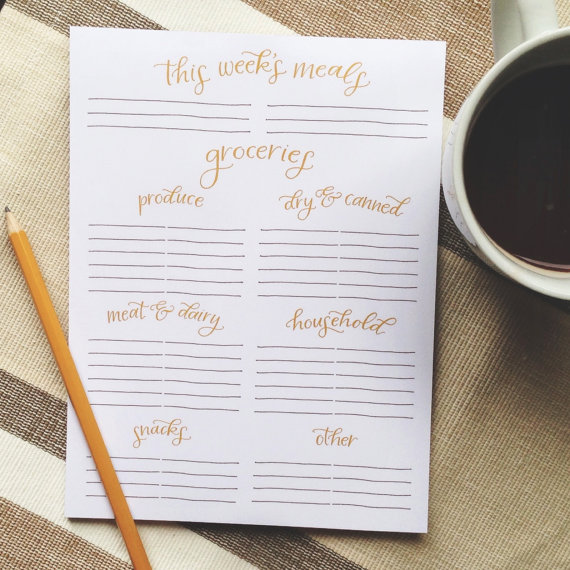
I've tried a few different types of weekly meal planners: I made my own chalkboard one with a vinyl sheet that I stuck to my fridge but I gave up on that after a few weeks because I had a hard time writing vertically; I used a small weekly calendar for a while but it didn't have room for a grocery list; and I wrote on a menu printable once but managed to lose the piece of paper three times in the span of seven days.  I love the one that Jolie at Brim Papery created, up at the top of this post, and I think I might try that next - I like the idea of a magnetic planner that can live on the fridge but with detachable pages for trips to the store.  At the moment, I'm using the wooden one you see in the collage below (and in the photo above).  I don't think it's technically a menu planner, but it's got one column that I designate for lunch and one for dinner and a notes column on the left that serves as my grocery list.  The whole notebook comes with me when I go to the supermarket so I don't lose the individual sheets and it's nice to look back on what past weeks' meals have been, especially when I need some inspiration.

Of course, Jon thinks this whole process is ridiculous and so I'm sure I'll have to tweak my methods when he gets here, but it's working for me really well right now!  Though I can always try to bring him over to Team Organization...

MEAL PLANNERS

 photo 866de425-8336-4c63-9efd-1c4dd8bf0e62_zpsafe0d56b.jpg